
Task sections in views
Sections are your own headings inside a project. Group tasks under them and see them in list, table, board and gallery views.
Statuses tell you what stage work is in, but not which part of the project it belongs to. Sections fill that gap: they're headings you create yourself, such as "Market research", "Messaging and content" and "Asset production", and you arrange tasks under them.
Sections are part of the project's structure, not a temporary filter. That's why they're available in list, table, board and gallery views, and every project member sees the same grouping.
Create a section
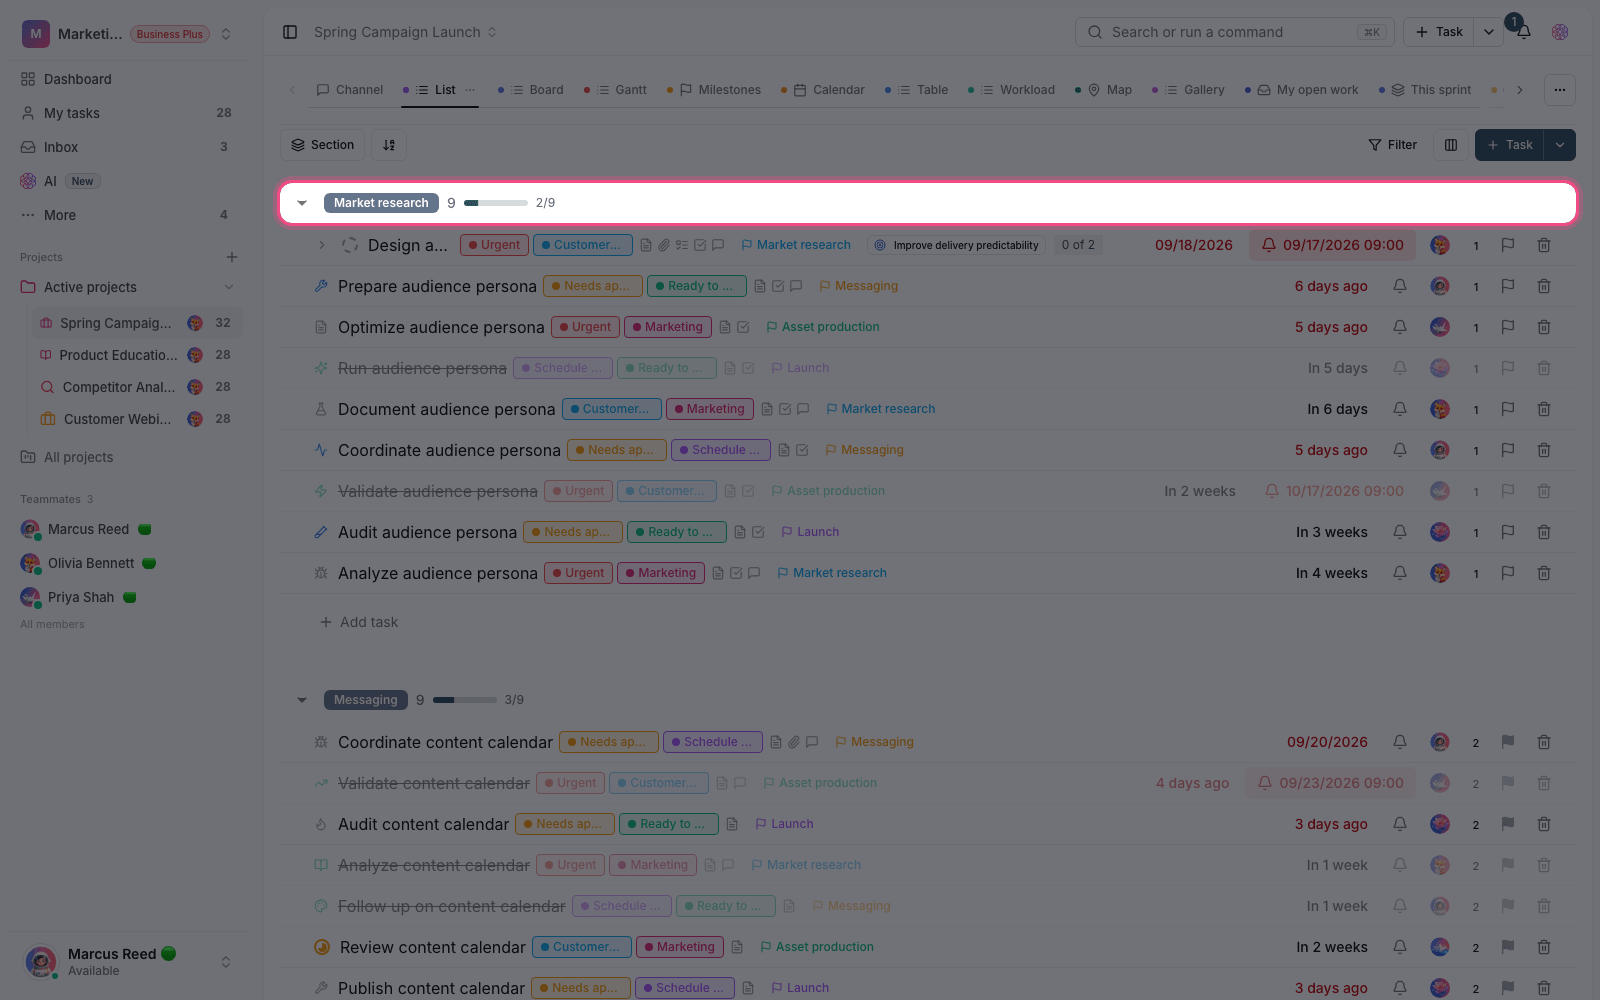
- In the project's list view, click Add section.
- Enter a name for the section and save it.
- Drag tasks under the section heading, or choose the target section when you create a task.
- Tasks that don't belong to any section stay under No section.
To add a section directly above or below an existing one, open the Section options menu and choose Add section above or Add section below. The new section is created right next to that section.
Section options
The Section options menu on each section heading lets you:
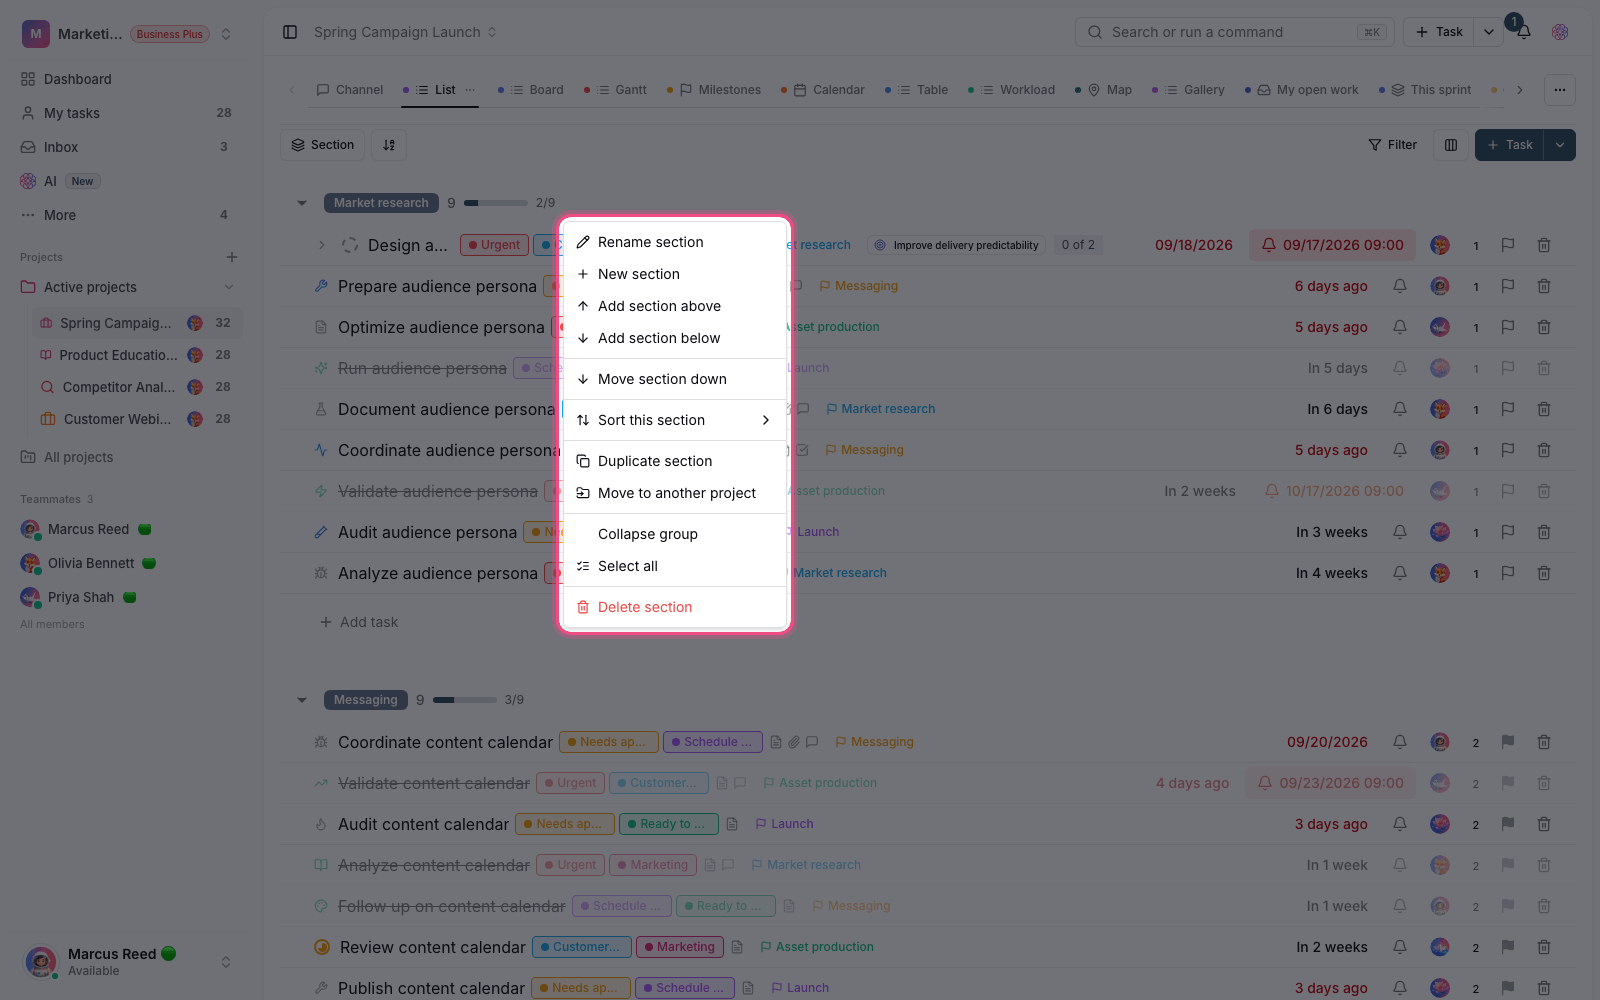
- Rename section: give the section a new name.
- Move section up / Move section down: change the order of sections. Dragging the heading does the same.
- Sort this section: sort the tasks inside that section in ascending or descending order, or choose Manual order to keep the order you've dragged them into.
- Duplicate section: make a copy of the section. With Also copy this section's tasks, you can bring its contents along too.
- Move to another project: move the section and all its tasks to a target project.
- Delete section: delete the section. Its tasks aren't deleted; they go back to No section.
Note: when you move a section to another project, task statuses are matched to the target project's statuses. If there's no matching status, the task is mapped to the closest status in the target project.
Sections in different views
- List: sections are collapsible headings with tasks underneath.
- Table: each section is a row group, and the columns stay shared.
- Board: you can use section as the basis for swimlanes, so each section becomes a horizontal row.
- Gallery: cards are grouped under section headings, and Section can be one of the fields shown on the card.
- Reorder section columns: when the board is grouped by section, you change the column order by grabbing the handle at the top of a column and dragging it, which used to be possible only from the section heading menu.
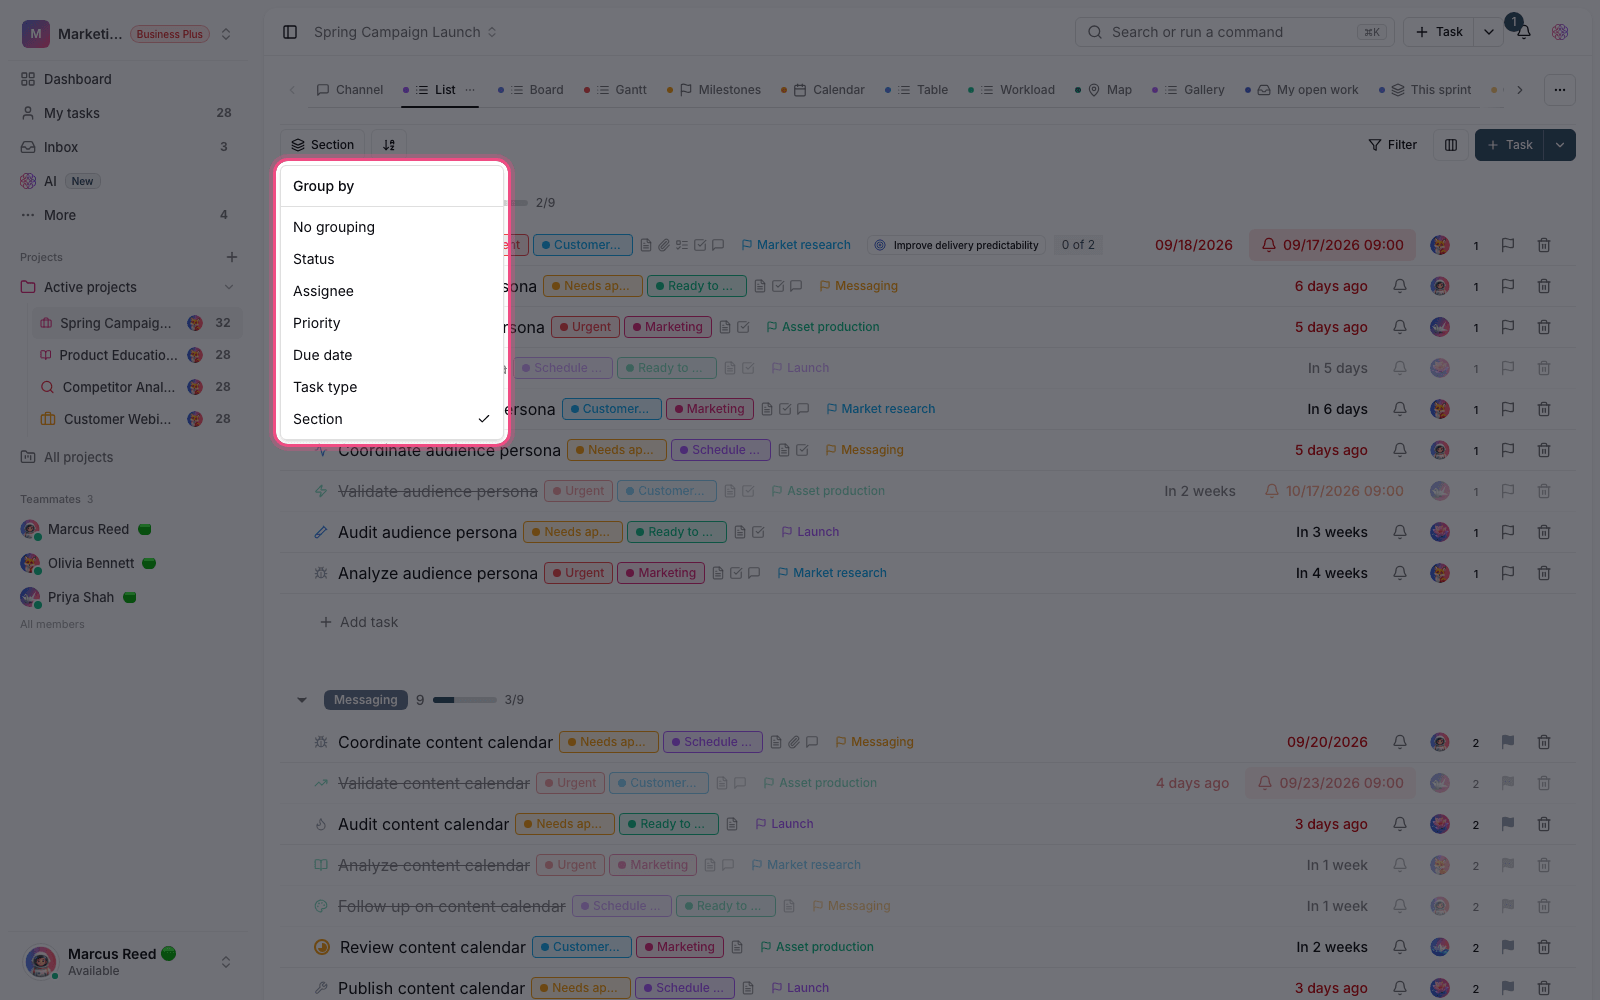
To turn on sections in a view, set the grouping to Section in View options. If grouping is set to No grouping, tasks are listed one after another without headings.
Plan required: basic sections are available to everyone, but advanced section features such as duplicating and moving sections between projects are available on the Pro plan and above.
To pick the right layout for each kind of work, see Choose the right view. To group with filters instead of a fixed structure, see Smart views.