
Checklists and checklist templates
Track small to-dos inside a task with checklists, give them due dates, and turn recurring sets into templates.
Not every small to-do deserves its own task. "Check the font", "Test the links", "Get legal sign-off": these are checklist items, not tasks. A checklist keeps those small to-dos inside the task itself.
Create a checklist
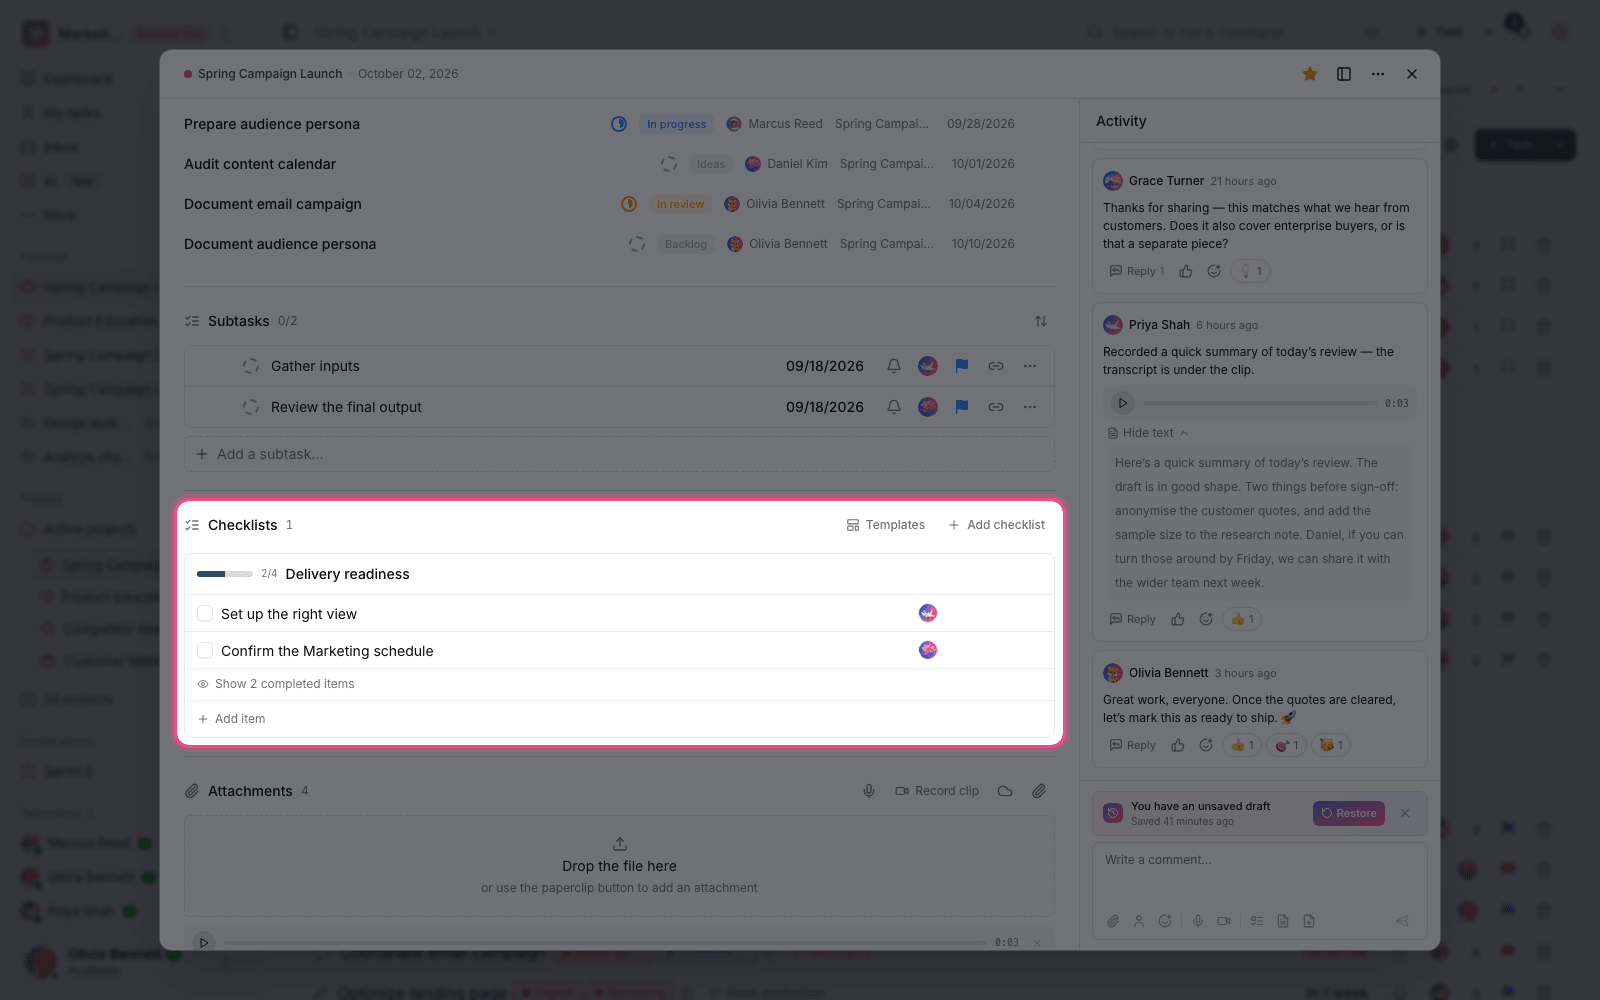
- Open the task and click Add checklist.
- Name the checklist. A task can have several checklists.
- Use Add item to enter items one by one.
- Click items to check them off. The checklist's progress bar updates.
- Use Complete all to check off every item at once.
Due dates and reminders for items
A checklist item can have its own due date. Use Add due date to set the item's date, and Add reminder to get a reminder before it's due. This is useful for time-bound checklists such as release steps.
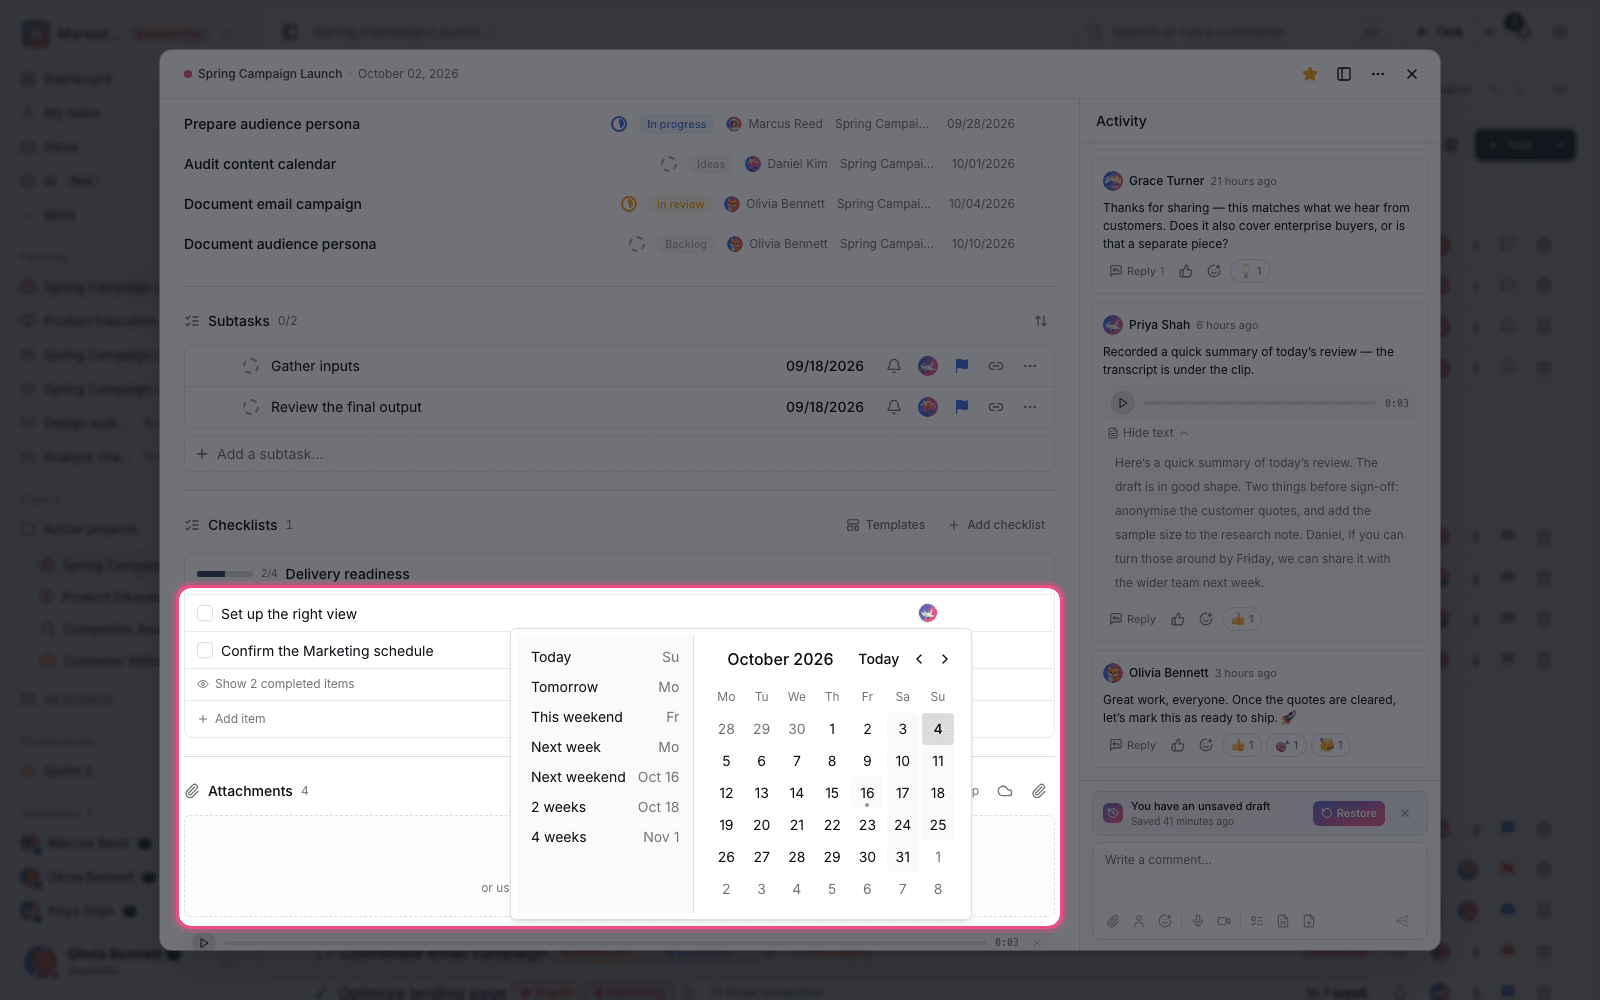
Plan required: Due dates on checklist items are available on the Pro plan and above. Checklists themselves work on every plan.
Convert an item into a task or subtask
Sometimes, partway through, you realize an item is too big to stay in a checklist. When that happens, promote it:
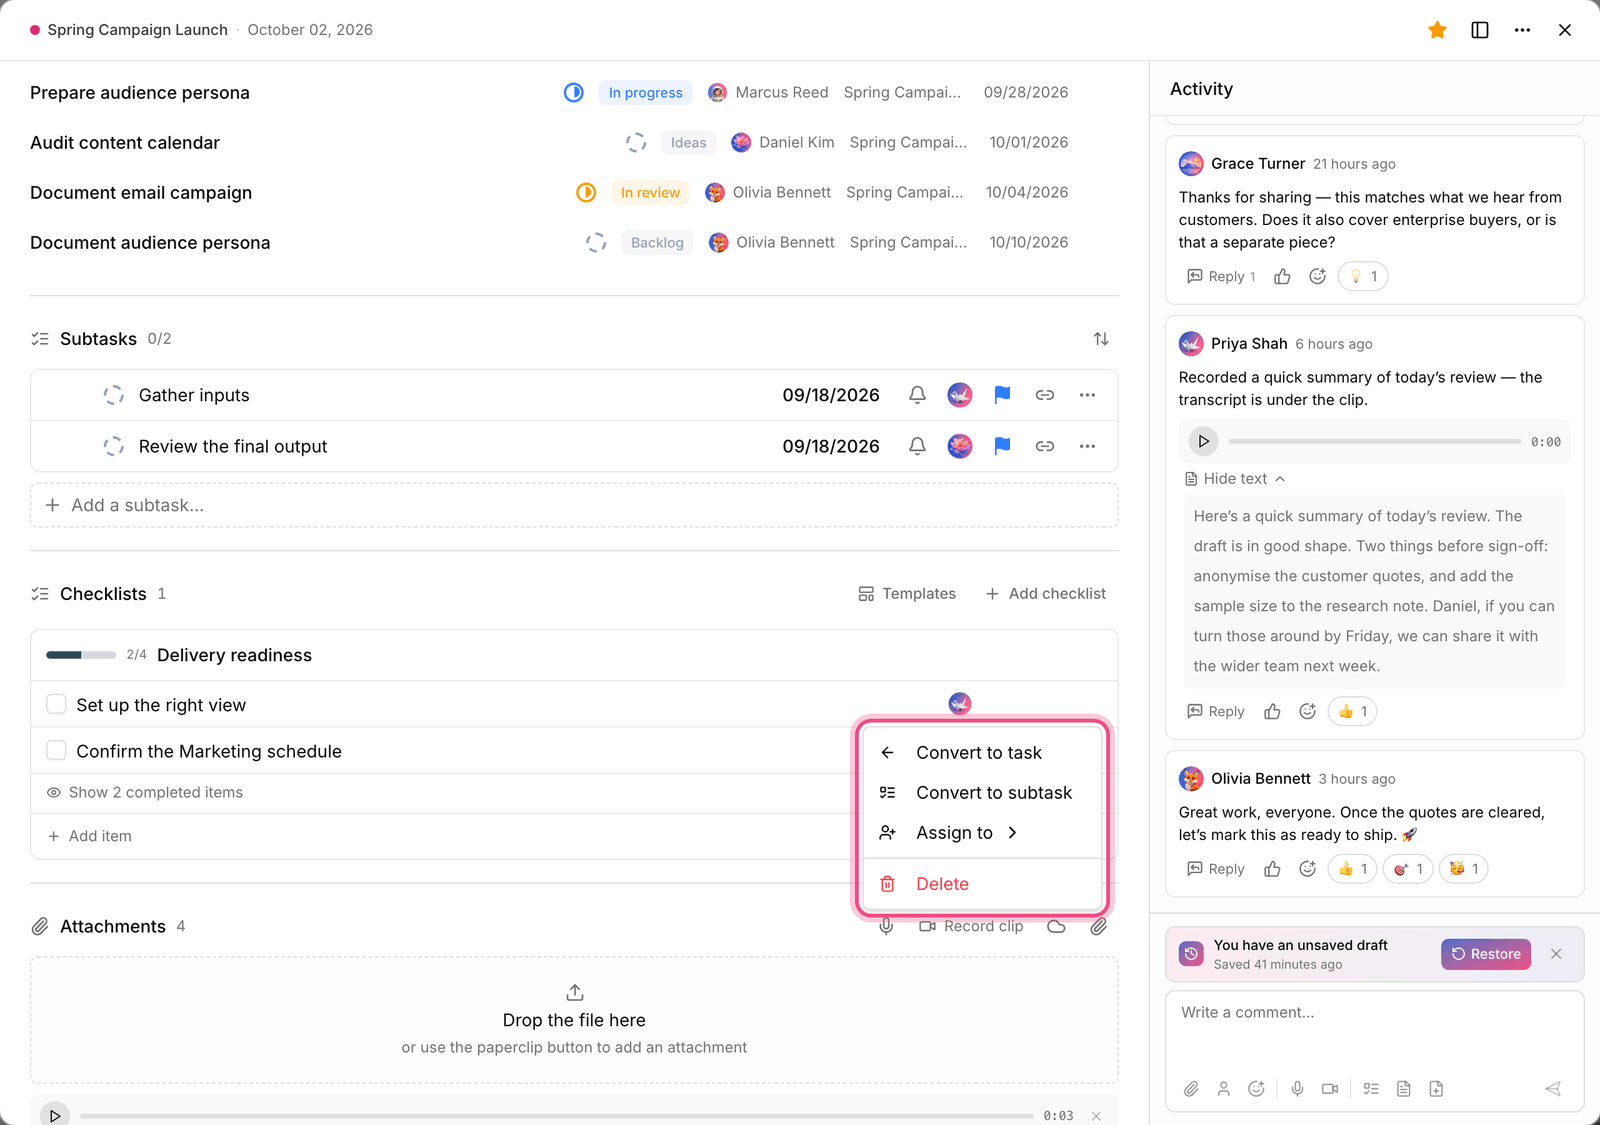
- Convert to subtask: the item becomes a subtask under the same task.
- Convert to a standalone task: the item becomes a separate task in the project.
- Convert the whole checklist: turn all open items in a checklist into subtasks at once.
Note: A completed item can't be converted into a task; only open items can be converted. If a checklist has no open items, you'll see the message "This checklist has no open items to convert".
Checklist templates
If you repeat the same checklist for every similar task, turn it into a template so you can add it with one click each time.
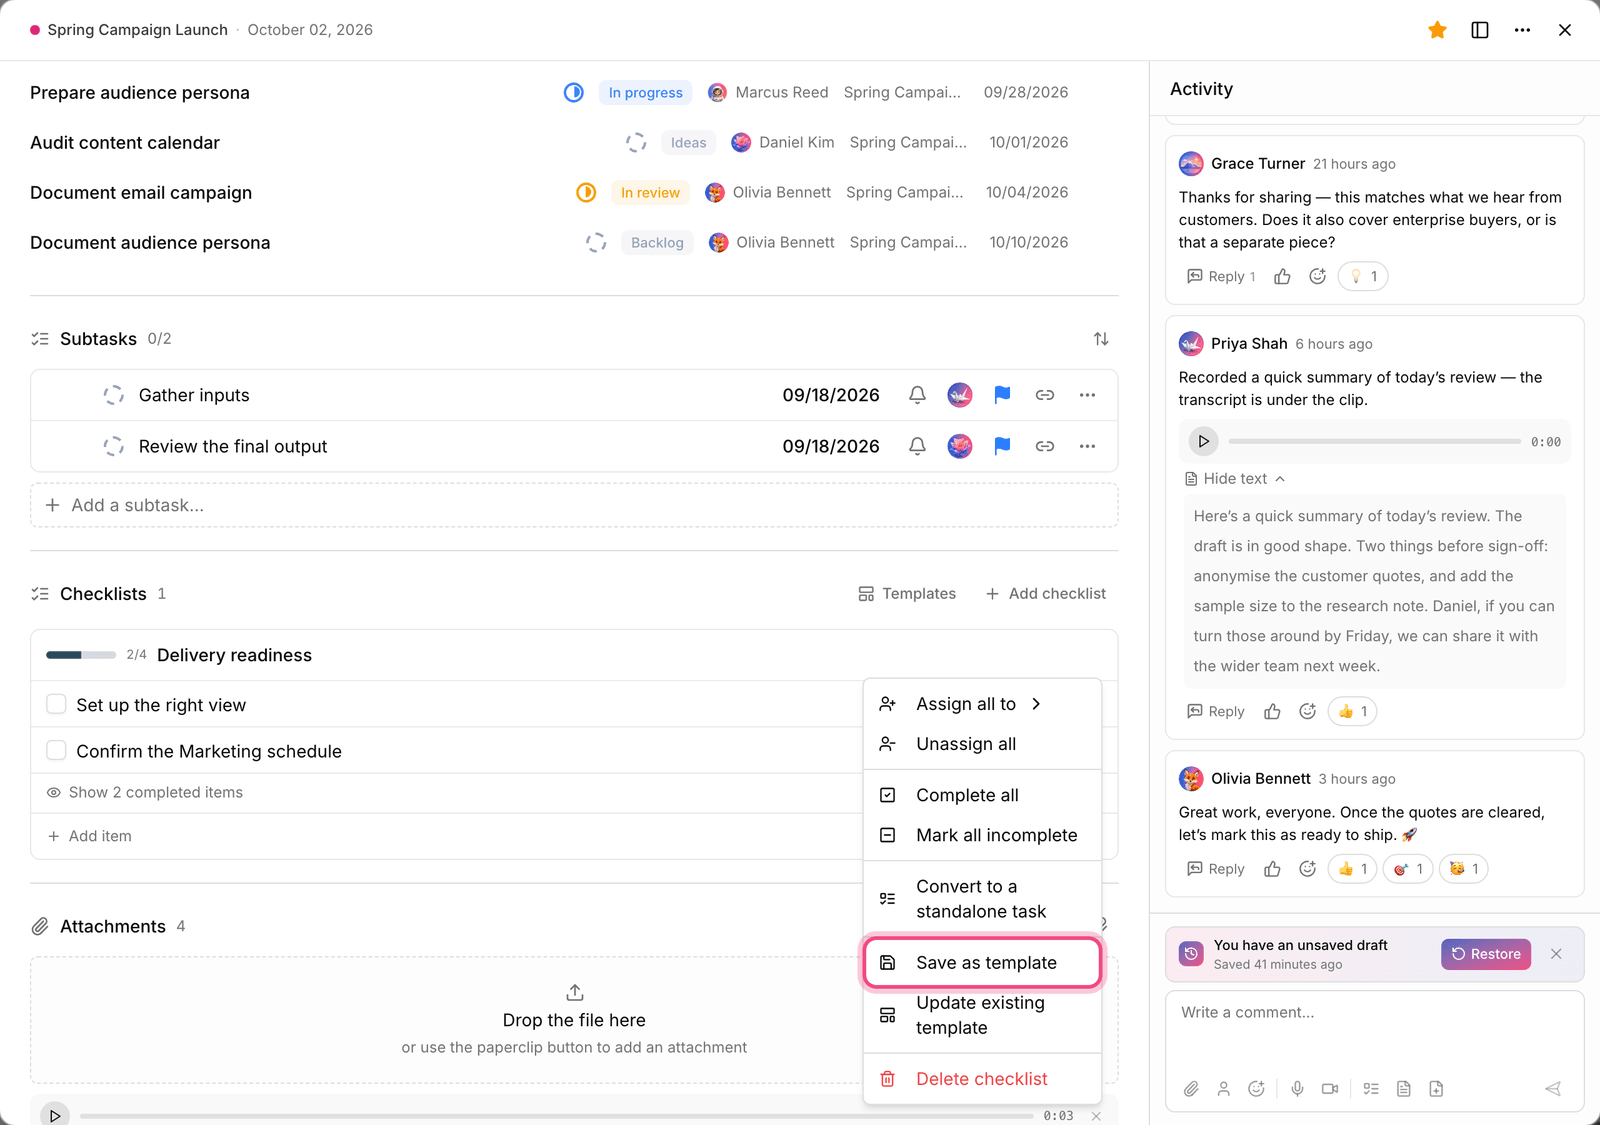
- Click Add checklist template to save the current checklist as a reusable template.
- To use it, click Use a checklist template in another task and find the template you want with the search box.
- The template is added to the task as a new checklist, or you can replace the items of the current checklist with it.
- Use Update existing template to save your changes to the template.
- You can set an access level for each template so it stays private or is available to the team.
Deleting a template doesn't change checklists that were already created from it.
Checklist or subtask?
Telling the two apart matters. Experience shows that teams either turn everything into subtasks and clutter the backlog, or turn everything into checklists and end up with work that can't be assigned.
- Checklist: work the task's own assignee does, that doesn't need a separate assignee or its own due date, and isn't counted in reports.
- Subtask: work that may be handed to someone else, has its own status, and should be visible in views and reports.
- A simple rule: if you need to know "who and by when", create a subtask. Otherwise, a checklist is enough.
For work that really is a task, see Subtasks and dependencies, and for the structure of a whole task, see Task details.