
Task details and management
How a task is structured in Taskie, how to edit it quickly right from the list, and how member access to task information is controlled.
Every piece of work your team does becomes a task in Taskie: a clear unit that says what needs to be done, who owns it, and when it's due. The more precise and complete these details are, the easier the work is to follow, and the less gets missed or lost in day-to-day conversations.
This page covers the parts that make up a task, how to change key values quickly right from the list without opening the task in full, and how access to task information is controlled for different members so sensitive data stays with authorized people only.
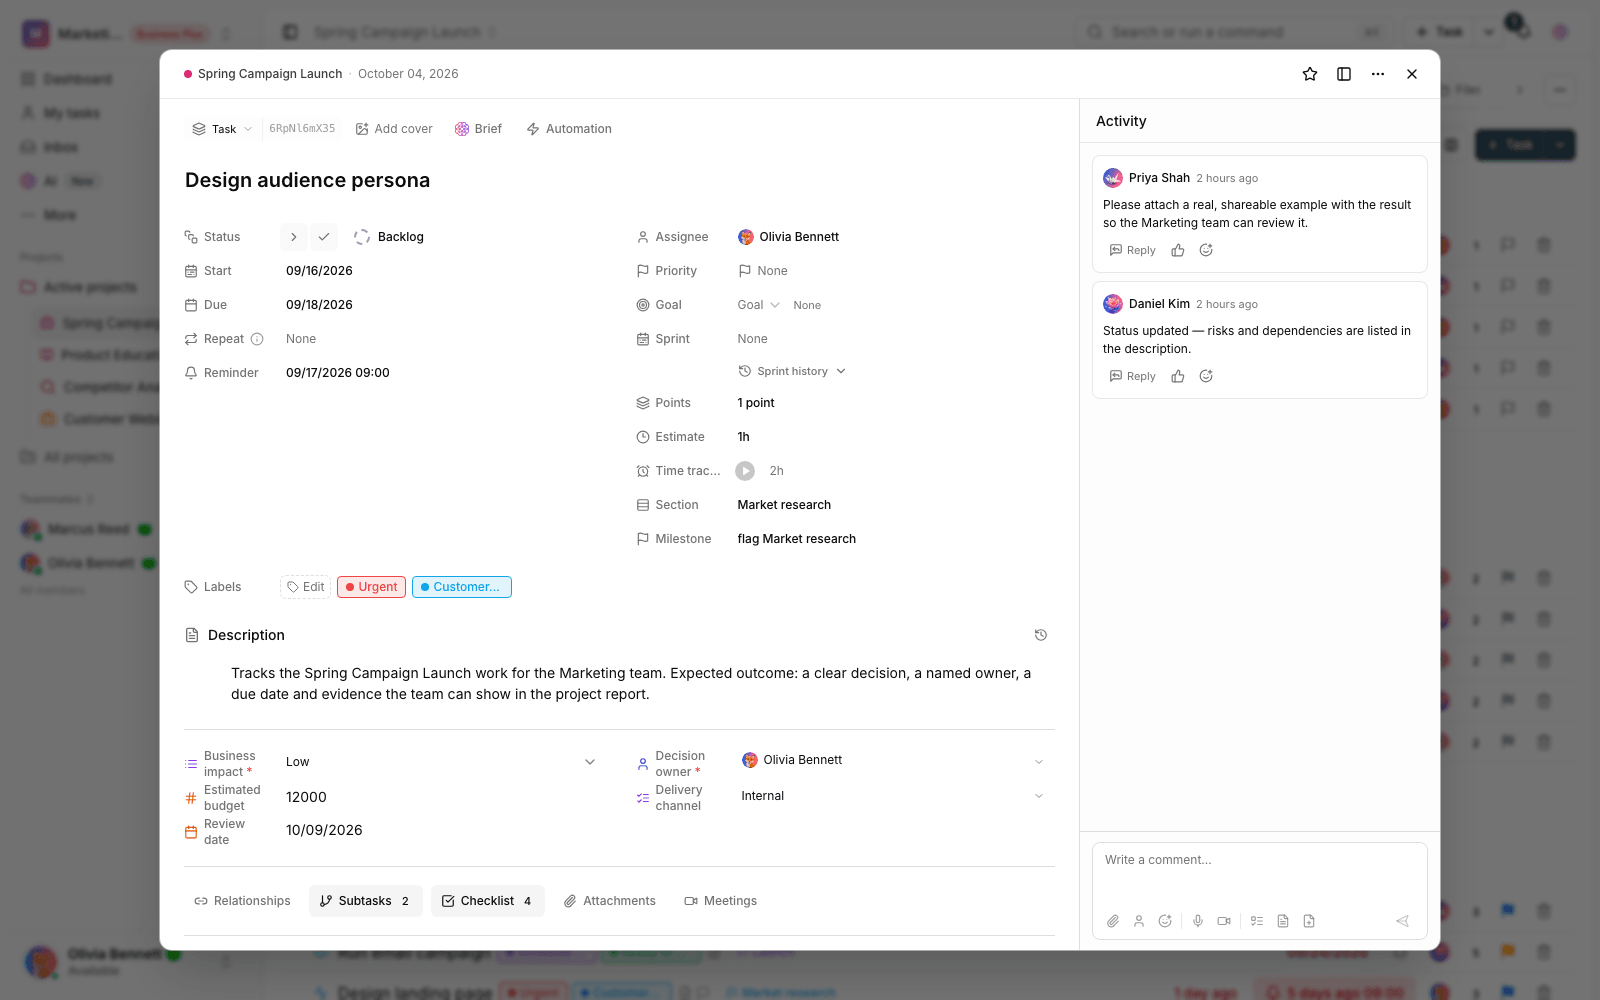
What are the parts of a task?
When you open a task, you see a set of fields next to its title that describe the state and schedule of the work. You don't need to fill them all in. A clear title, an assignee, and a due date are usually enough to get started, and you can complete the rest as needed.
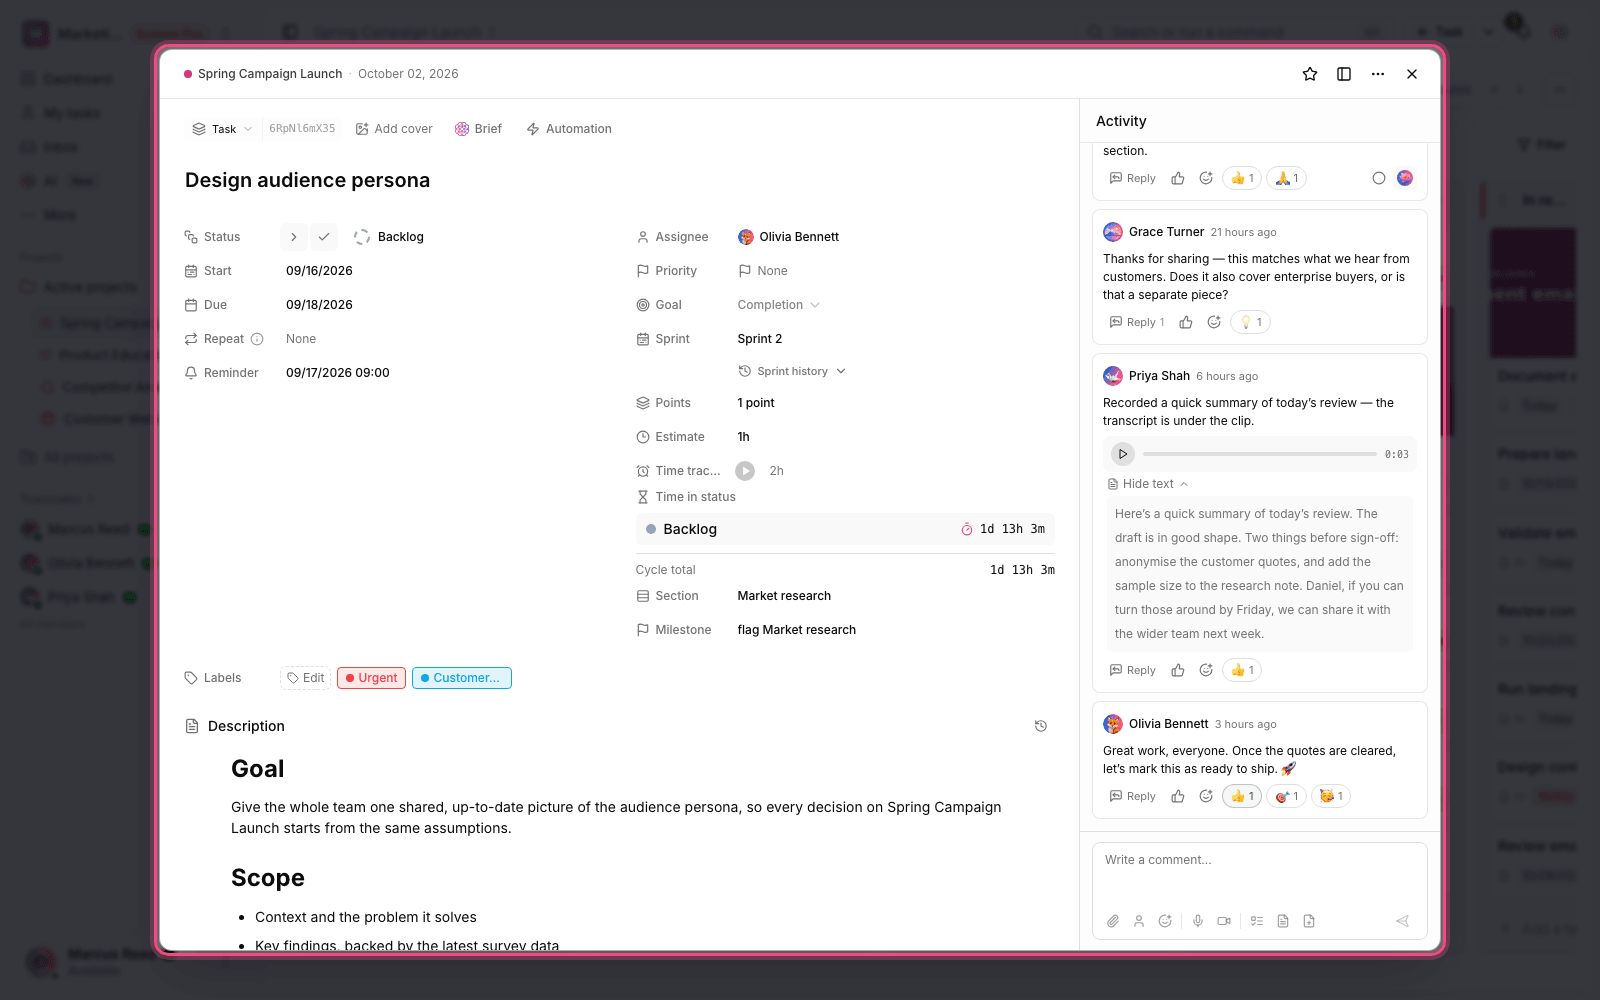
- Title: a short, action-oriented description of the work. It's best to start with a verb so the intent is clear.
- Assignee: the person responsible for doing the work. Each task gets one specific assignee so accountability is clear.
- Status: the stage the work is in, chosen from the statuses defined for the workspace.
- Dates: a start date, a due date, and an optional reminder so the work gets noticed on time.
- Description: a full write-up of the work with formatting, lists, and links so everything is clear in one place.
- Attachments and cover image: attach related files and images directly to the task so they stay with the work.
On top of these, each task can have a priority, labels, checklists, subtasks, a task type, and custom fields. These are explained on other pages in this category and help you categorize and track work more precisely.
Quick editing from the list
You don't need to open a task in full for everyday changes. In List view, you can change many values directly on the row. This speeds up team updates and keeps you focused.
- Click the status circle at the start of the row to move the work to the next stage.
- Click the assignee icon and pick the person you want to hand the work to.
- Use the flag icon to set the priority, from Low to Urgent, or clear it.
- Click the date area to set the due date or a reminder in the Taskie calendar.
- You can also add or remove labels from the same row without leaving the list.
Tip: To see all the details, the full description, attachments, subtasks, and comments, click the task title to open its full panel. Quick editing is only for the most-used values.
Add a description, attachments, and reminders
The task description is where you record everything the assignee needs to do the work right: the goal, technical notes, links, and the definition of done. The more complete it is, the fewer scattered back-and-forth questions you need. You can also add related files to the same task as attachments so they're always available next to the work.
If the work has a set time, add a reminder so the assignee is notified before the due date. A cover image also helps important tasks stand out faster in Board view.
Control access to sensitive information
Every task belongs to its project and workspace, and access to it is controlled by member roles. This means a task's information is visible only to members of the related project, and the ability to edit depends on role level.
- Members with the Editor role or higher can change a task. Read-only members (guests) can only view it.
- If a member's access is limited to a specific view, they see only the tasks in that view, and the project's other work stays hidden from them.
- Personal tasks that aren't connected to any team workspace are visible only to the person who created them.
- After a sprint is closed, its tasks become read-only so the work history stays intact.
This way you can be sure that sensitive details such as descriptions, attachments, and internal fields are available only to the people who should see them. For finer control, set each member's role correctly at the project and workspace level.
Next step: to add several tasks in a row quickly, go to Quick add and bulk actions. To break a big piece of work into smaller parts, see Subtasks and dependencies.
For small to-dos inside a task, see Checklists and checklist templates, and for bulk data entry, see Import tasks from a file.